Create Org Blueprint Using Python
Overview
In this tutorial, you will walk through the steps required to build an org Blueprint for your organization using Python. After creation, this Blueprint can be used to convert a XLSX, Parquet, or TSV file to a CSV.
By the end of the tutorial, you'll be able to:
- Create a custom Blueprint.
- Pass Blueprint variables to your solution.
- Pass environment variables to your solution.
- Install package dependencies for your solution.
Steps
- Using the sidebar, click on Blueprints to navigate to the Blueprints page.
- Click the Add Blueprint button on the top right of the screen.
Step 1 - Select a Language
Click on the Python option. You'll be immediately redirected to the next step.
Step 2 - Provide Blueprint Variables
- Click the plus sign next to Blueprint Variables to add a new Blueprint Variable. This will pop up a menu to input information about the Blueprint Variable.
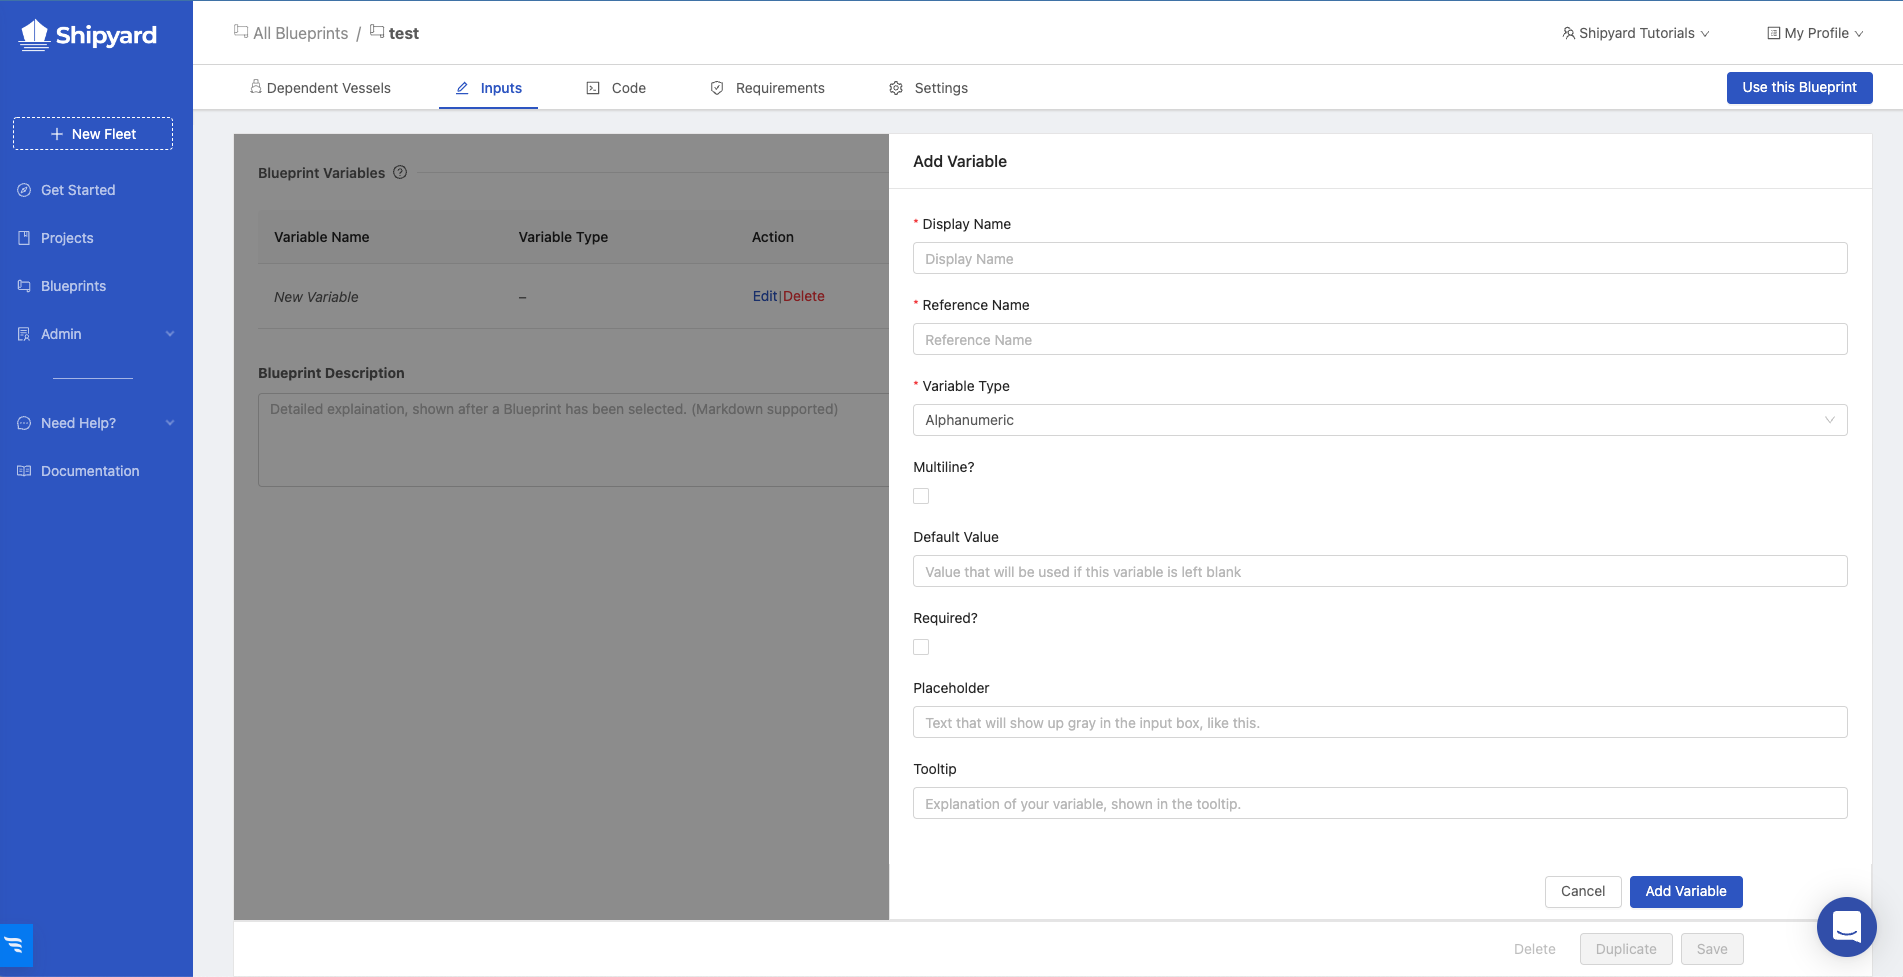
- Input the following information:
| Input | Value |
|---|---|
| Display Name | Initial File |
| Reference Name | initial_file |
| Variable Type | Alphanumeric |
| Required? | Yes |
| Placeholder | Name of the file that you want to convert |
- Click Add Variable.
- Click the plus sign next to Blueprint Variables to add a second Blueprint Variable. Input the following information:
| Input | Value |
|---|---|
| Display Name | Converted File |
| Reference Name | converted_file |
| Variable Type | Alphanumeric |
| Required? | Yes |
| Placeholder | Name of the file after converting |
- Click Add Variable.
- Click the plus sign next to Blueprint Variables to add a third Blueprint Variable. Input the following information:
| Input | Value |
|---|---|
| Display Name | Initial File Format |
| Reference Name | initial_file_format |
| Variable Type | Select |
| Required? | Yes |
| Placeholder | File type of the initial file that will be converted to CSV |
- Before we click Add Variable, we need to add the options that the user will have when selecting a file type. Click the plus sign next to Select Options 3 times to add the following select options:
| Display Name | Reference Name |
|---|---|
| XLSX | xlsx |
| Parquet | parquet |
| TSV | tsv |
- Select
XLSXas the default value. - Click Add Variable.
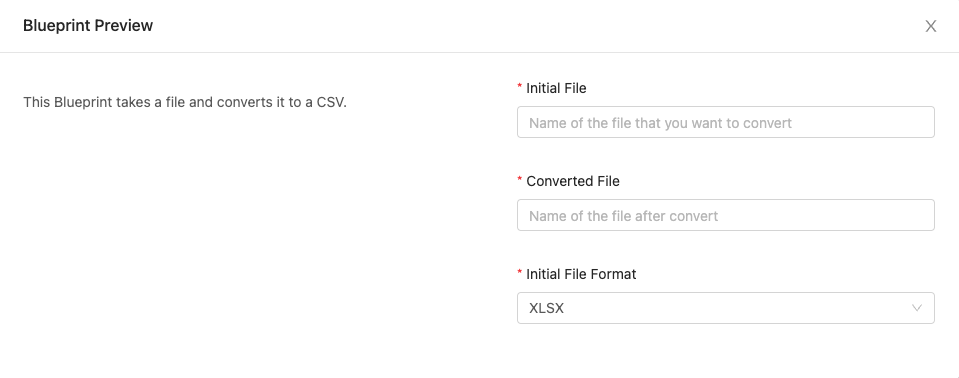
- Under Blueprint Description, enter:
This Blueprint takes a file and converts it to a CSV. - Click the Preview this Blueprint button to take a look at what a user will see when trying to use this Blueprint.
- Click Next Step.
Step 3 - Code
- Under File Name, enter
convert_to_csv.py - Under Code, enter the following code block:
import pandas as pd
import os

initial_file = os.environ.get('initial_file')
converted_file = os.environ.get('converted_file')
initial_file_format = os.environ.get('initial_file_format')
current_user = os.environ.get('current_user')


print(f'Hello {current_user}!')
print(f'Converting {initial_file} to CSV.')
if initial_file_format == 'xlsx':
    xlsx_dataframe = pd.read_excel(initial_file)
    xlsx_dataframe.to_csv(converted_file)
elif initial_file_format == 'parquet':
    parquet_dataframe = pd.read_parquet(initial_file, engine="fastparquet")
    parquet_dataframe.to_csv(converted_file)
elif initial_file_format == 'tsv':
    tsv_dataframe = pd.read_csv(initial_file, sep='\t')
    tsv_dataframe.to_csv(converted_file)
print(f'{converted_file} is ready to use!')
- Under File to Run, enter
convert_to_csv.py

- Click Next Step.
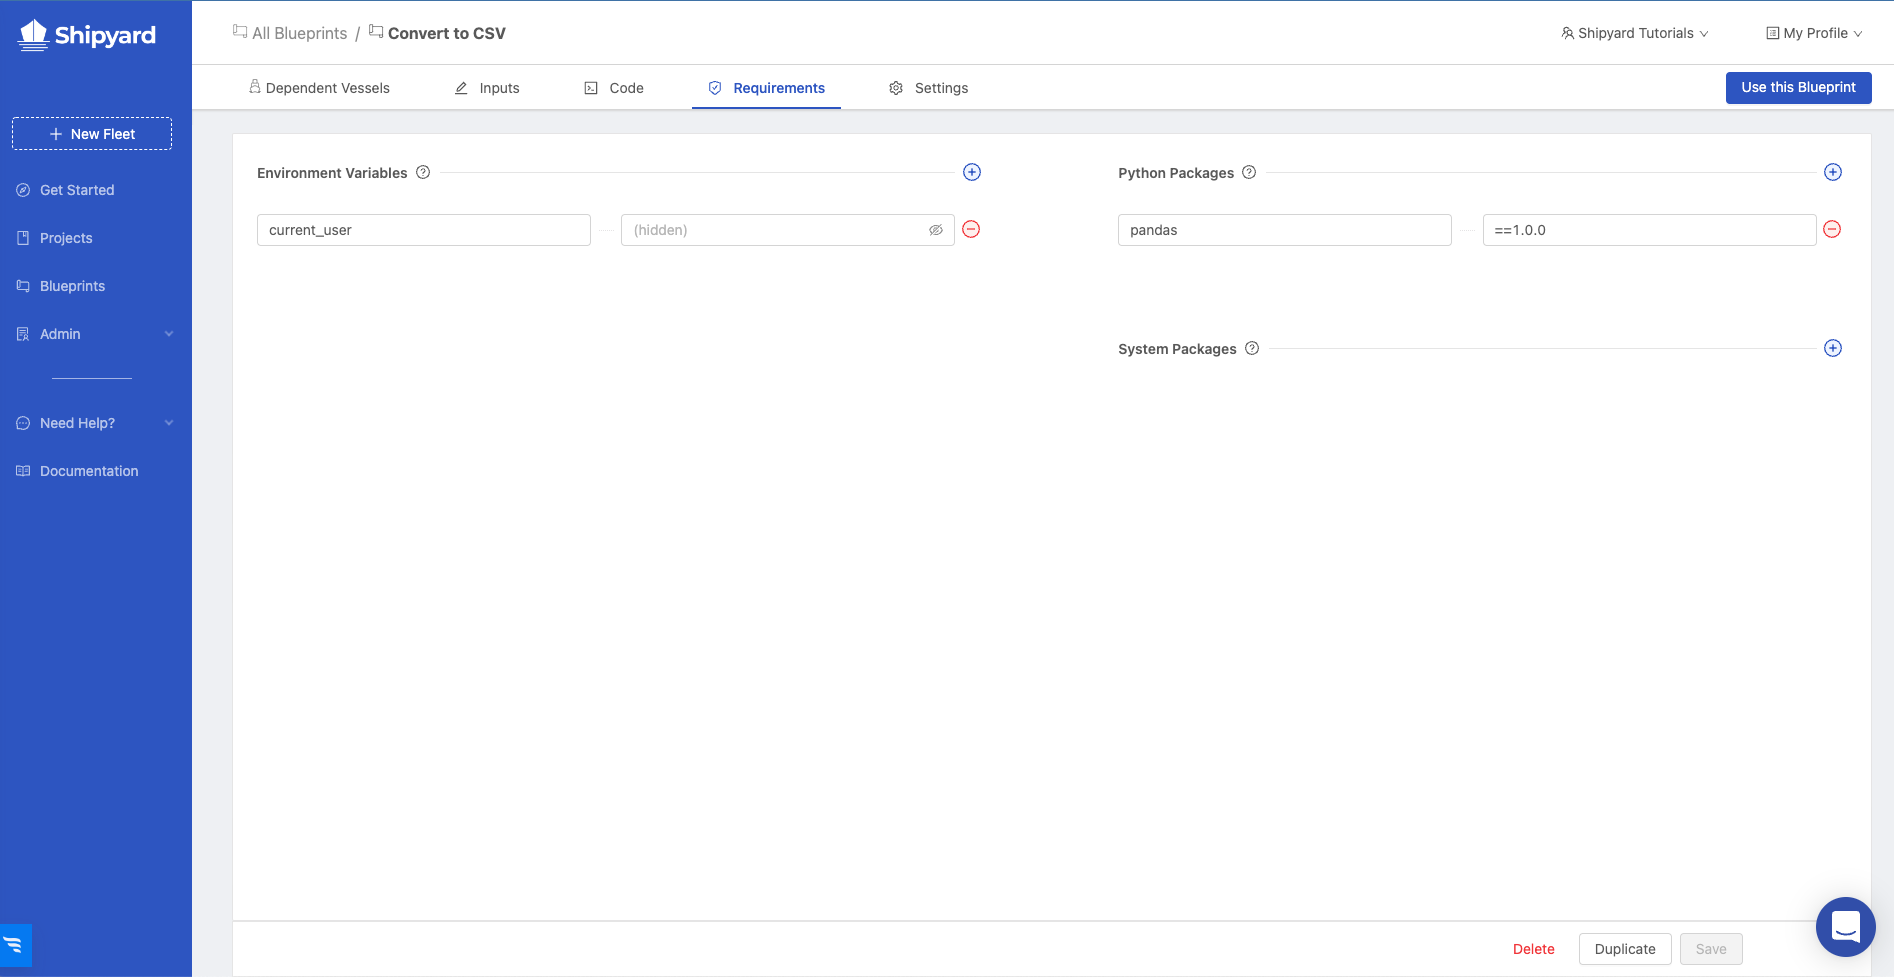
Step 4 - Requirements
- Click the plus sign next to Environment Variables to add an environment variable.
- For the name, enter
current_user. - For the hidden value, enter the name of everyone's favorite pirate: Jack_Sparrow.
- Click the plus sign next to Python Packages to add a package.
- Enter
pandasfor the name and==1.0.0for the version. - Click Next Step.
Step 5 - Settings
- Set the Visibility to Everyone.
- Under Blueprint Name, enter
Convert to CSV. - Under Synopsis, enter
Blueprint used to convert files to CSV. - Under Icon, enter
https://cdn-icons-png.flaticon.com/512/14/14521.png
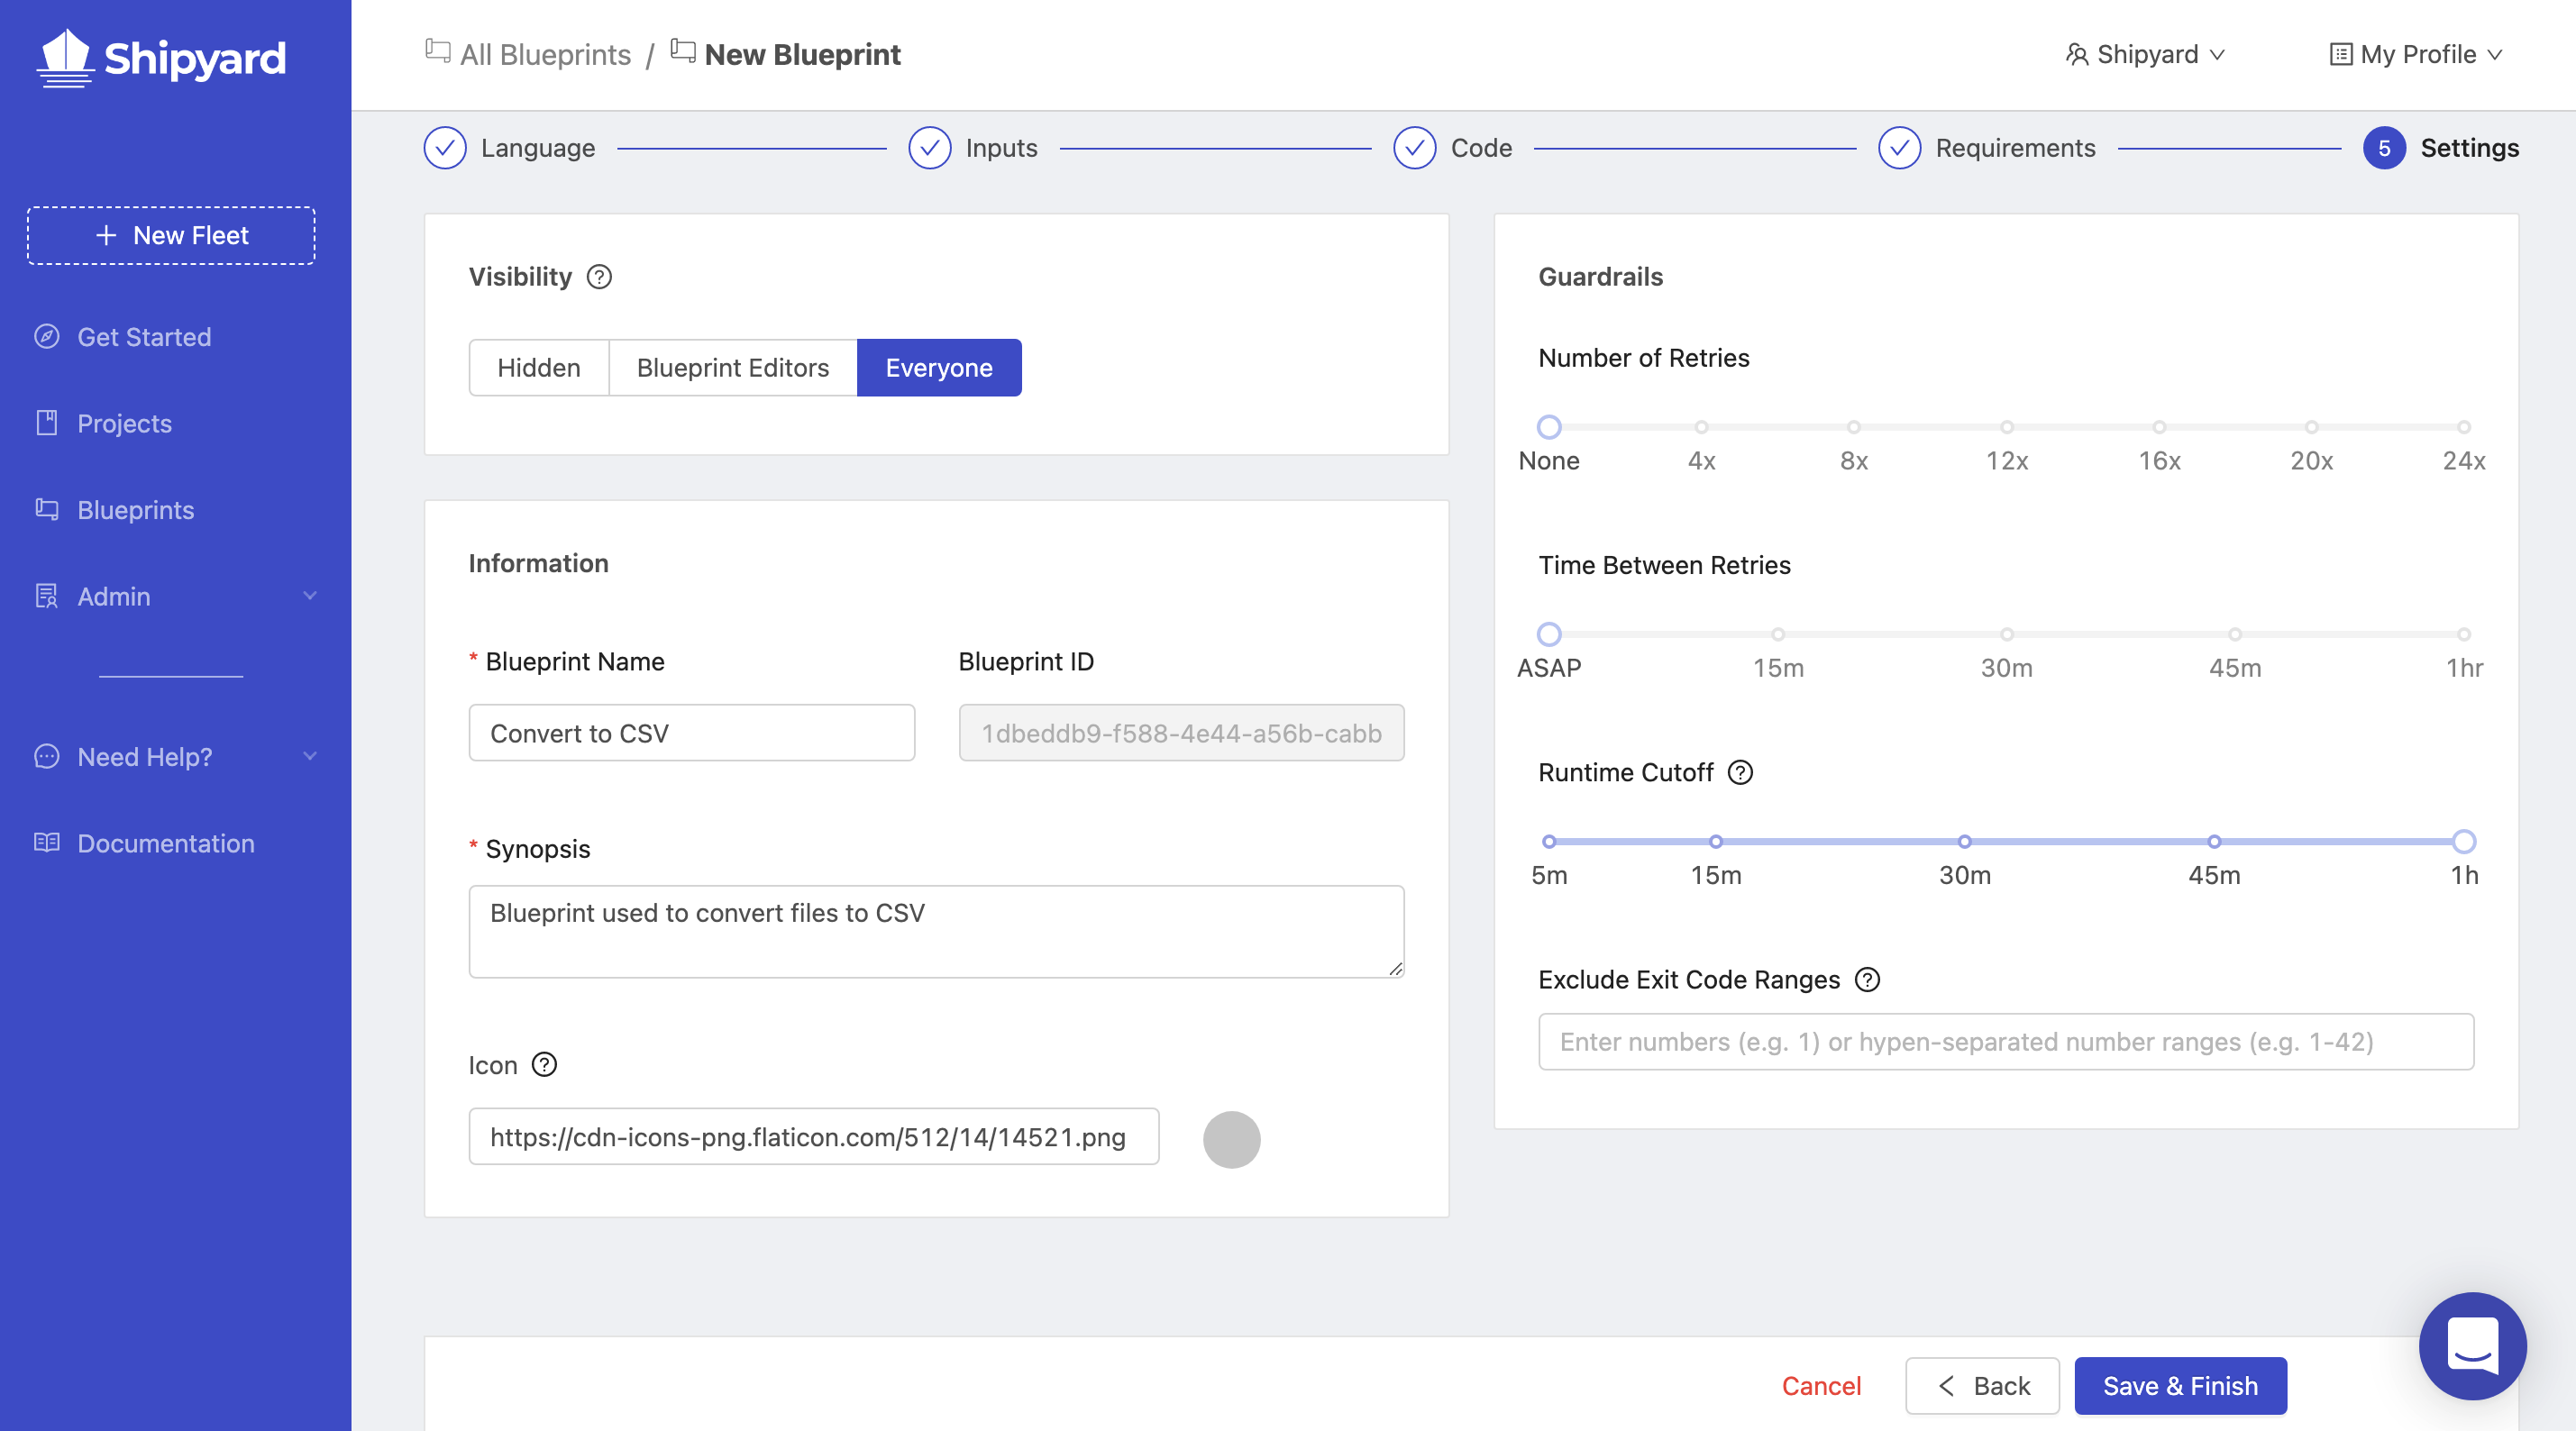
- Click Save & Finish. This will redirect you to a page that tells you that your Blueprint has been created successfully.

Success
You've successfully created a Blueprint for your organization. Click Use this Blueprint or select it in the Fleet Builder to test it out! If you want to learn how to create a Fleet, feel free to head over to our tutorial on just that!