dbt Core Part 3 - Setting Up dbt on Platform
In part 3 of this guide, we will move into Platform to deploy dbt Core in the cloud. First, we will need to create a free developer account for Platform. After we have a developer account, we will create a Blueprint that can run dbt Core commands.
Connect to GitHub
- Connect to your GitHub account by following this guide. After connecting your GitHub account, you'll be ready to create your first Blueprint.
Creating dbt Core Blueprint
- On the sidebar of Platform's website, click Blueprints.
- Click Add Blueprint on the top right of your page.
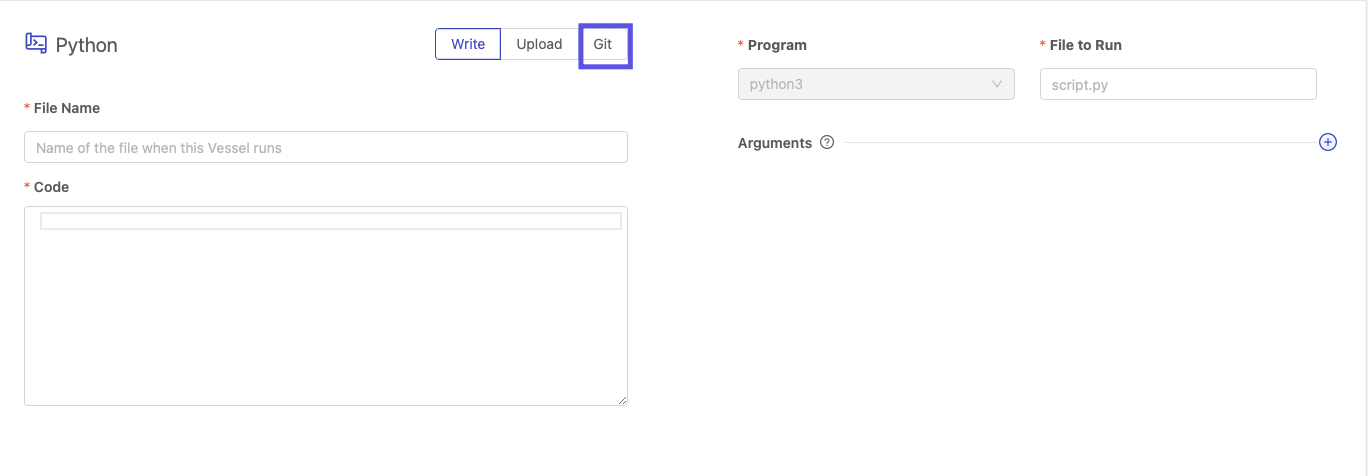
- Select Python.
Setting Blueprint Inputs
- Under Blueprint variables, click Add Variable.
- Under Display Name, enter
dbt CLI Command. - Under Reference Name, enter
dbt_command. - Under Default Value, enter dbt run.
- Click the check box for required.
- Under Placeholder, enter
Enter the command for dbt. - Click Next
Connect to your dbt Code
- Click Git.
- Select the repository where your dbt files sit.
- Click the source that you want the files pulled from. Generally main or master.
- Under File to Run, enter
execute_dbt.py. - Under Git Clone Location, select the option for Unpack into Current Working Directory.
- Click Next Step on the bottom right of the screen.
Add Requirements
- Next to Environment Variable, click the plus sign 3 times to add 3 new environment variables.
The environment variables that need to be added will vary based on the cloud database that you use. Please select your database below.
If a value is wrapped in {} this means that you need to update this with a value that's unique to your situation:
- BigQuery
- Databricks
- Redshift
- Snowflake
| Variable Name | Value |
|---|---|
| BIGQUERY_CREDS | {bigquery_json_credentials} |
| BIGQUERY_KEYFILE | ./bigquery_creds.json |
| DBT_PROFILES_DIR | . |
| Variable Name | Value |
|---|---|
| databricks_host | {host_from_databricks} |
| databricks_token | token_from_databricks} |
| DBT_PROFILES_DIR | . |
| Variable Name | Value |
|---|---|
| redshift_username | {username_from_redshift} |
| redshift_password | {password_from_redshift} |
| DBT_PROFILES_DIR | . |
| Variable Name | Value |
|---|---|
| snowflake_trial_account | {snowflake_account_name} |
| dbt_user_password | {password_from_snowflake} |
| DBT_PROFILES_DIR | . |
- Click the plus sign next to Python Packages twice to add two new packages.
- BigQuery
- Databricks
- Redshift
- Snowflake
- In the first Name field, enter
dbt-bigquery. In the version field, enter==1.0.0.
- In the first Name field, enter
dbt-databricks. In the version field, enter==1.0.0.
- In the first Name field, enter
dbt-redshift. In the version field, enter==1.0.0.
- In the first Name field, enter
dbt-snowflake. In the version field, enter==1.0.0.
- Click Next.
Blueprint Settings
- Under Bluprint Name, enter
dbt - Execute CLI Command. - Under Synopsis, enter
This Blueprint runs a dbt core command. - Click Save & Finish.
- On the success screen, click Use this Blueprint. This will take you over to the Fleet Builder.
Build dbt Core Fleet
The Fleet Builder will now be visible with one Vessel located inside of the Fleet, built using your new dbt - Execute CLI Command Blueprint. On the left-hand side of your screen, you'll see the settings for the Vessel.
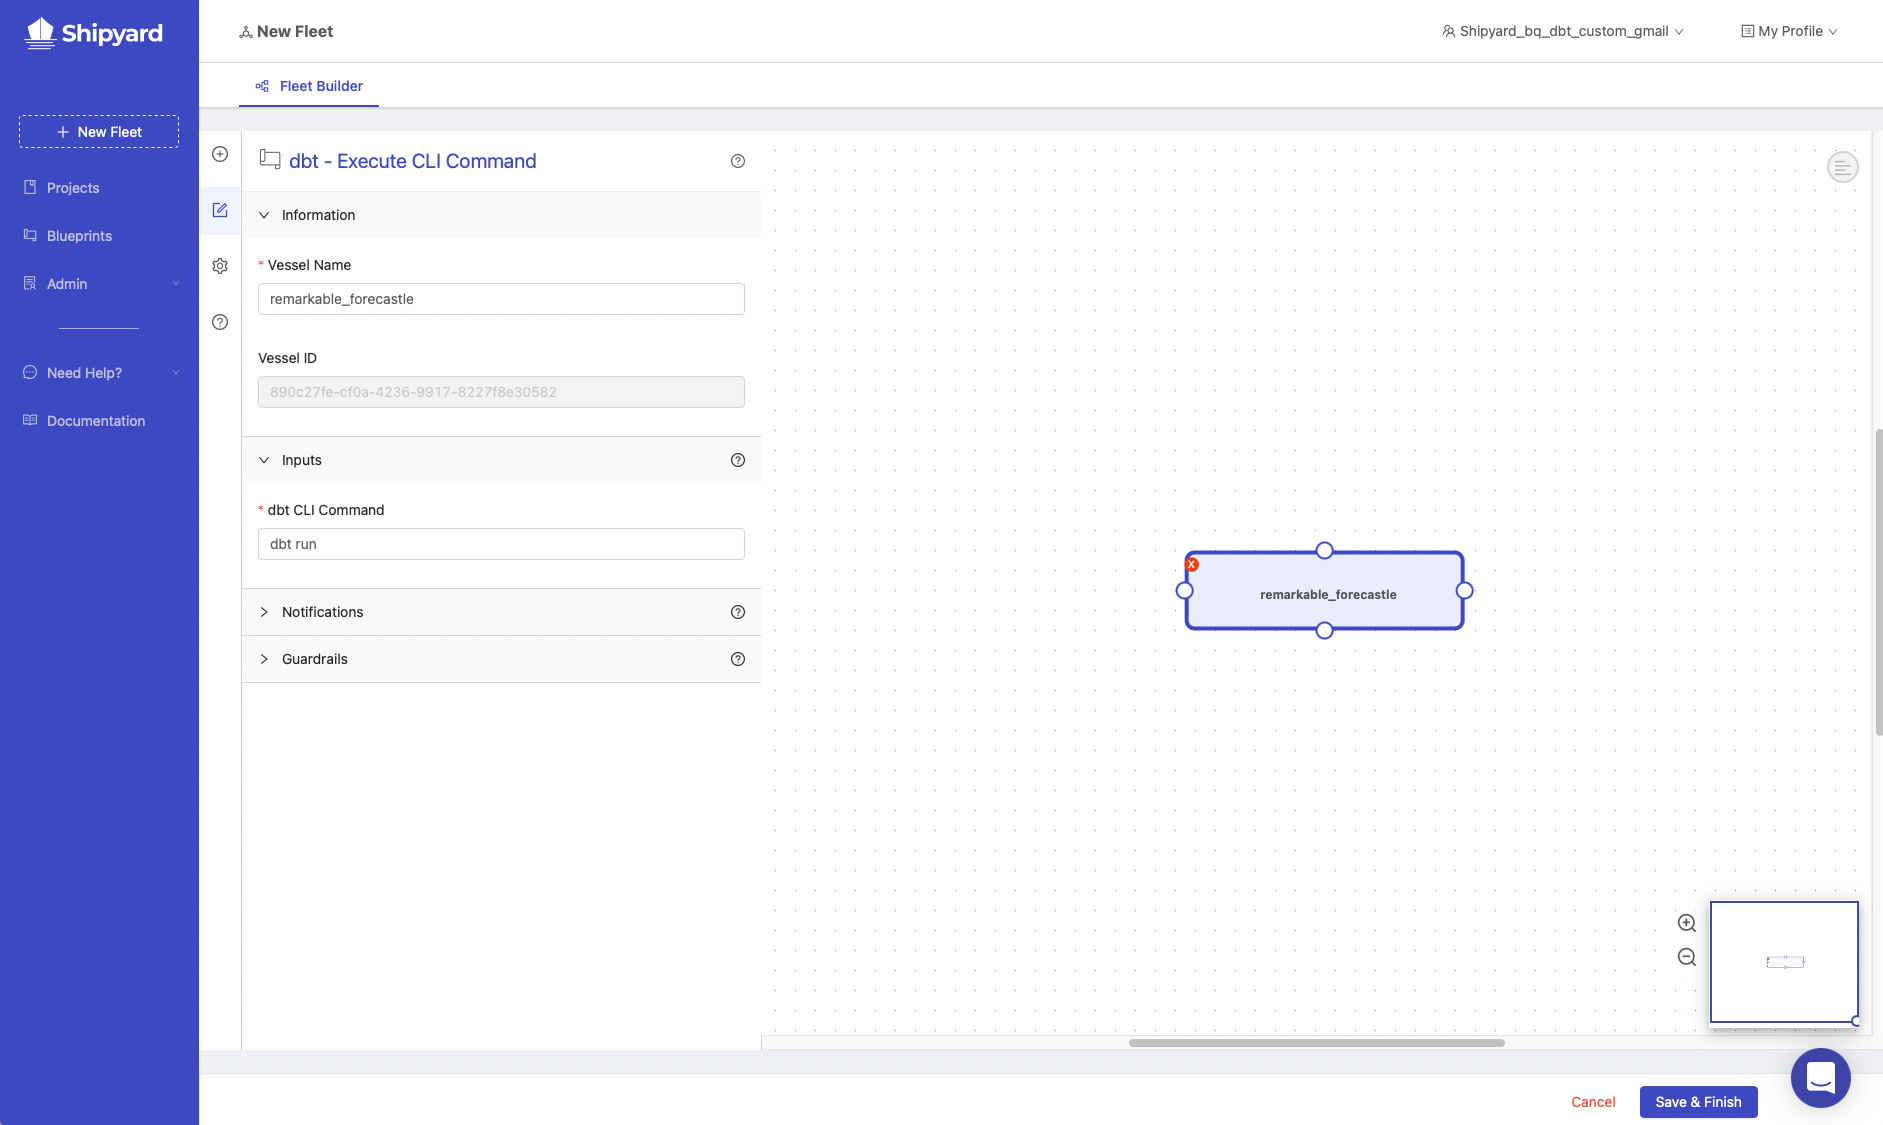
- Under Vessel Name, enter
dbt Core CLI Command. - Under dbt CLI Command, enter
dbt debug. - Click the gear on the sidebar to open Fleet Settings.

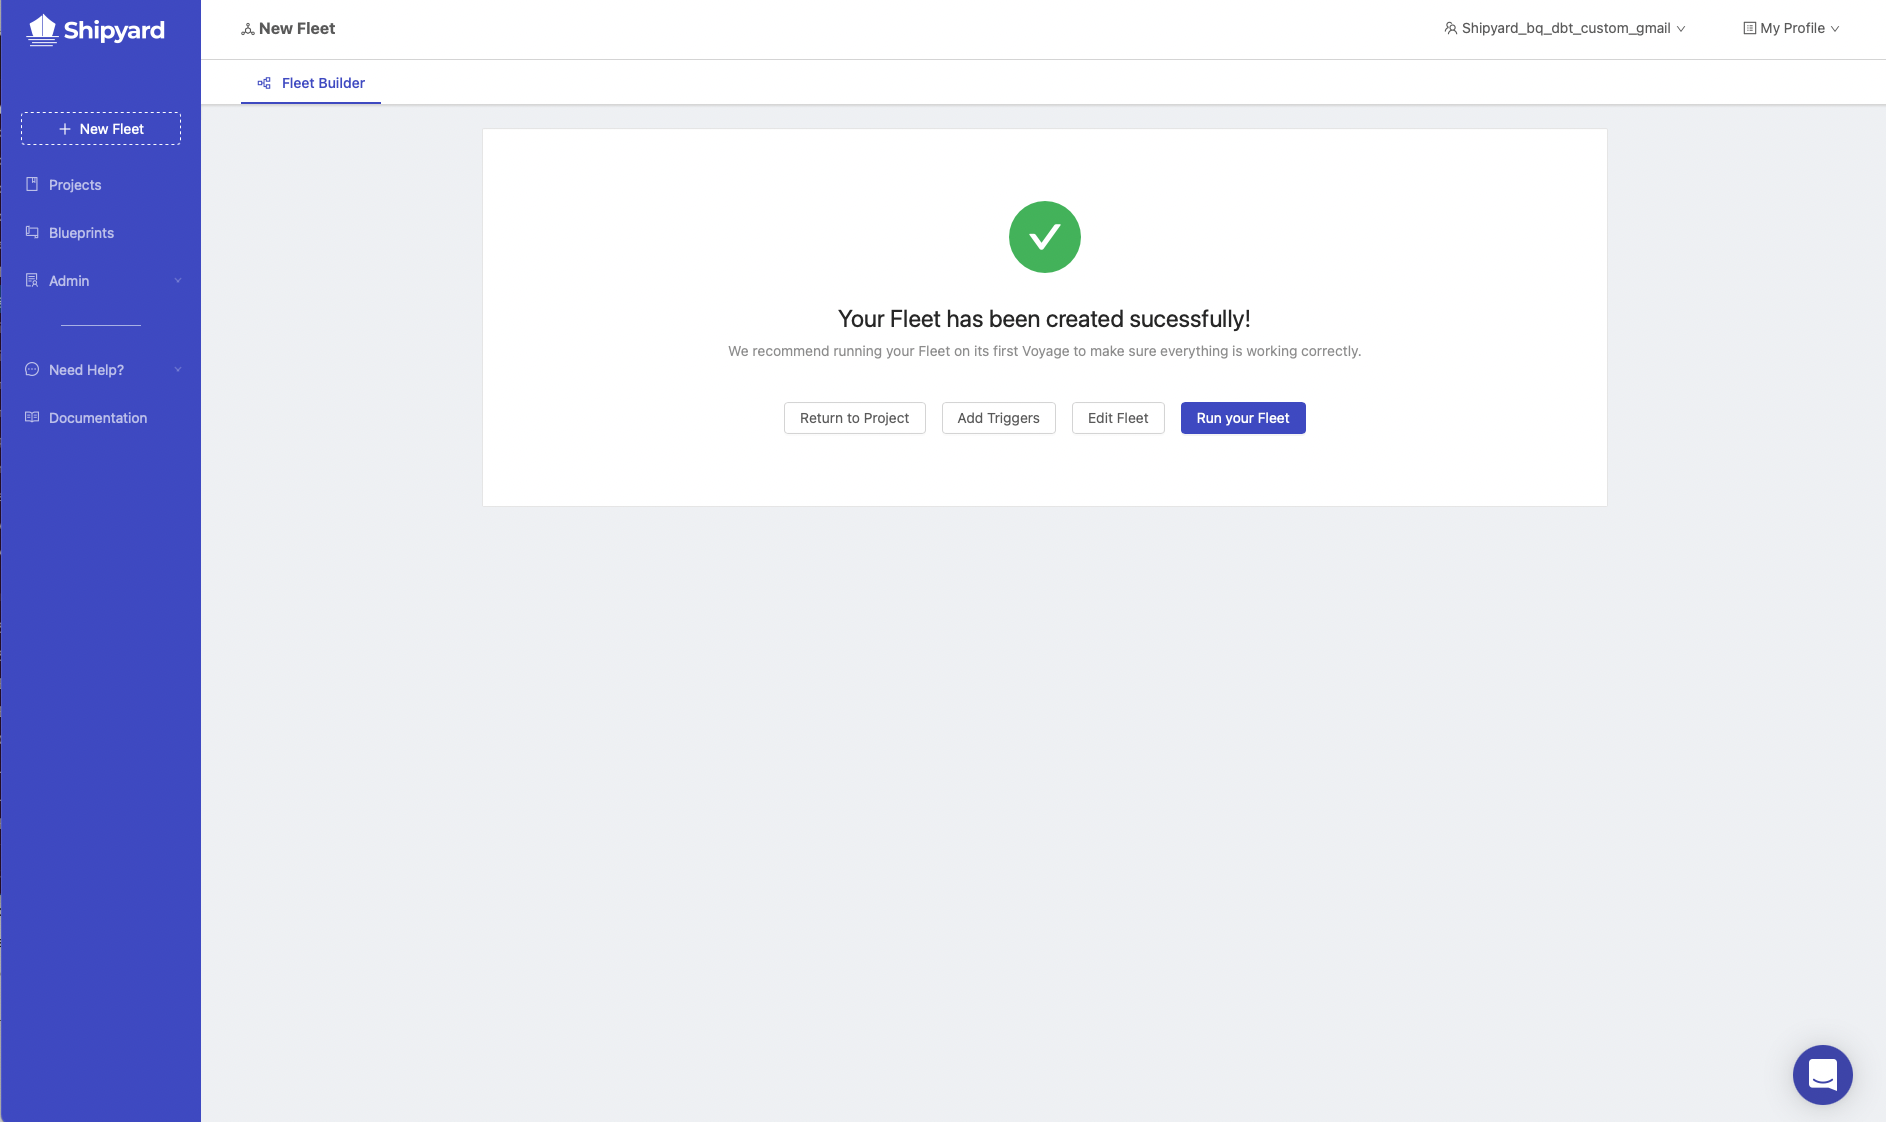
- Under Fleet Name, enter
dbt Core. - Click Save & Finish on the bottom right of your screen. This will take you to a page showing that your Fleet was created successfully.
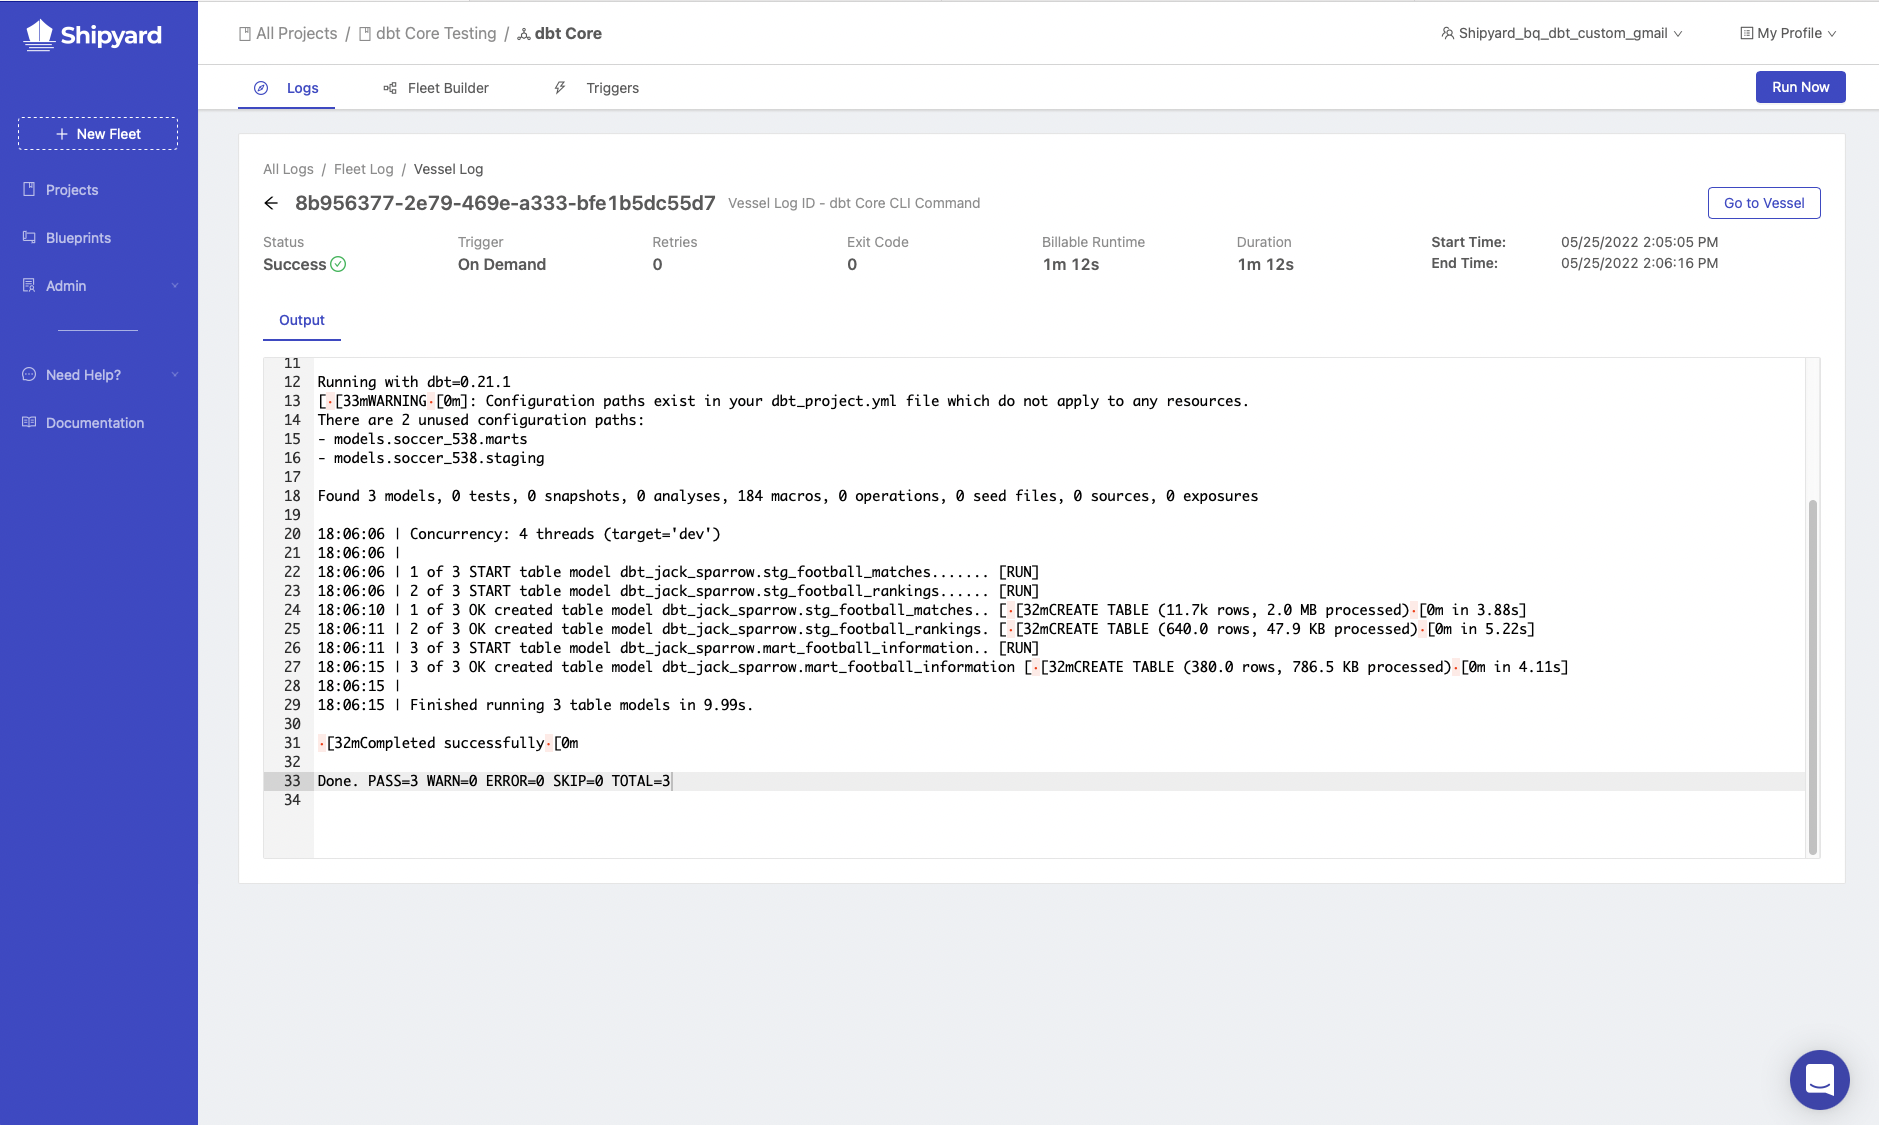
Run dbt Core Fleet
- Click Run Your Fleet. This will take you over to the live running Fleet Log.
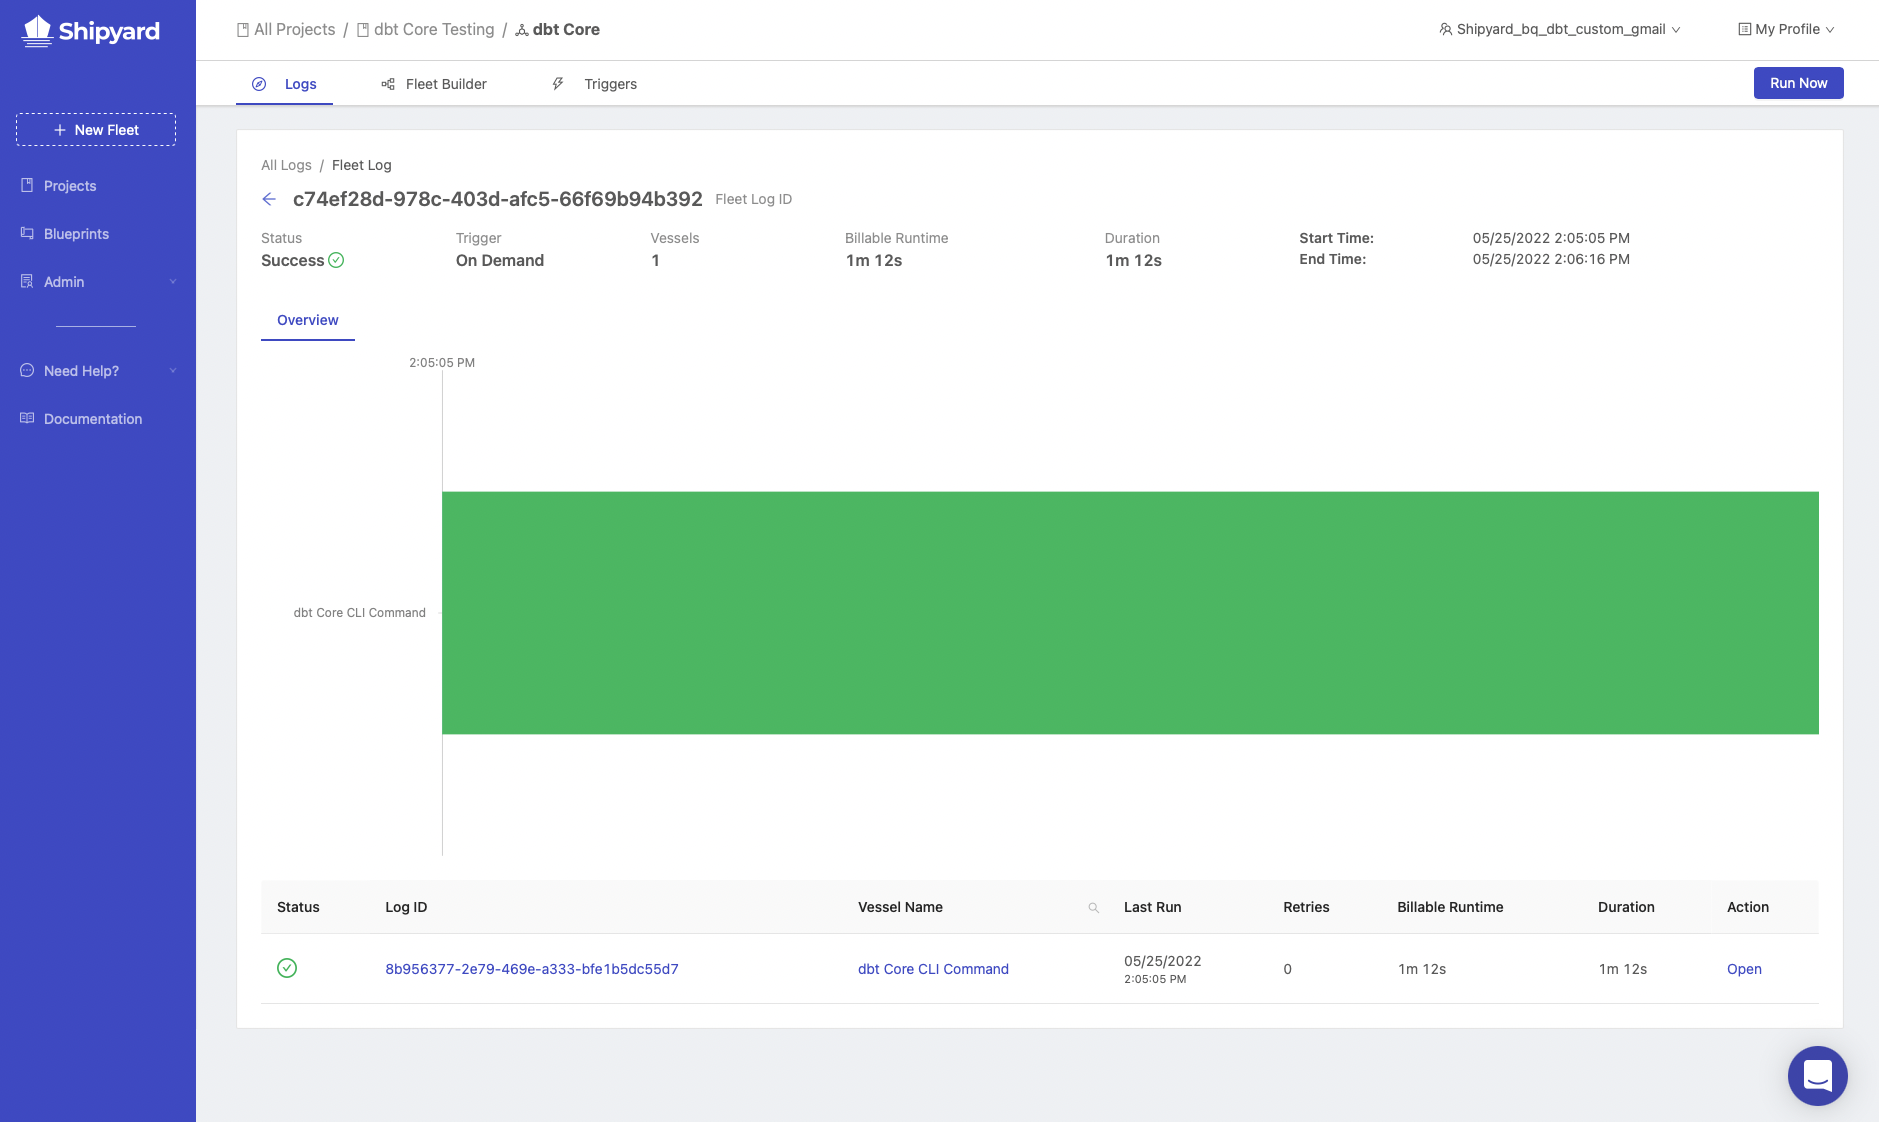
- Click on the bar to get the output from your run.
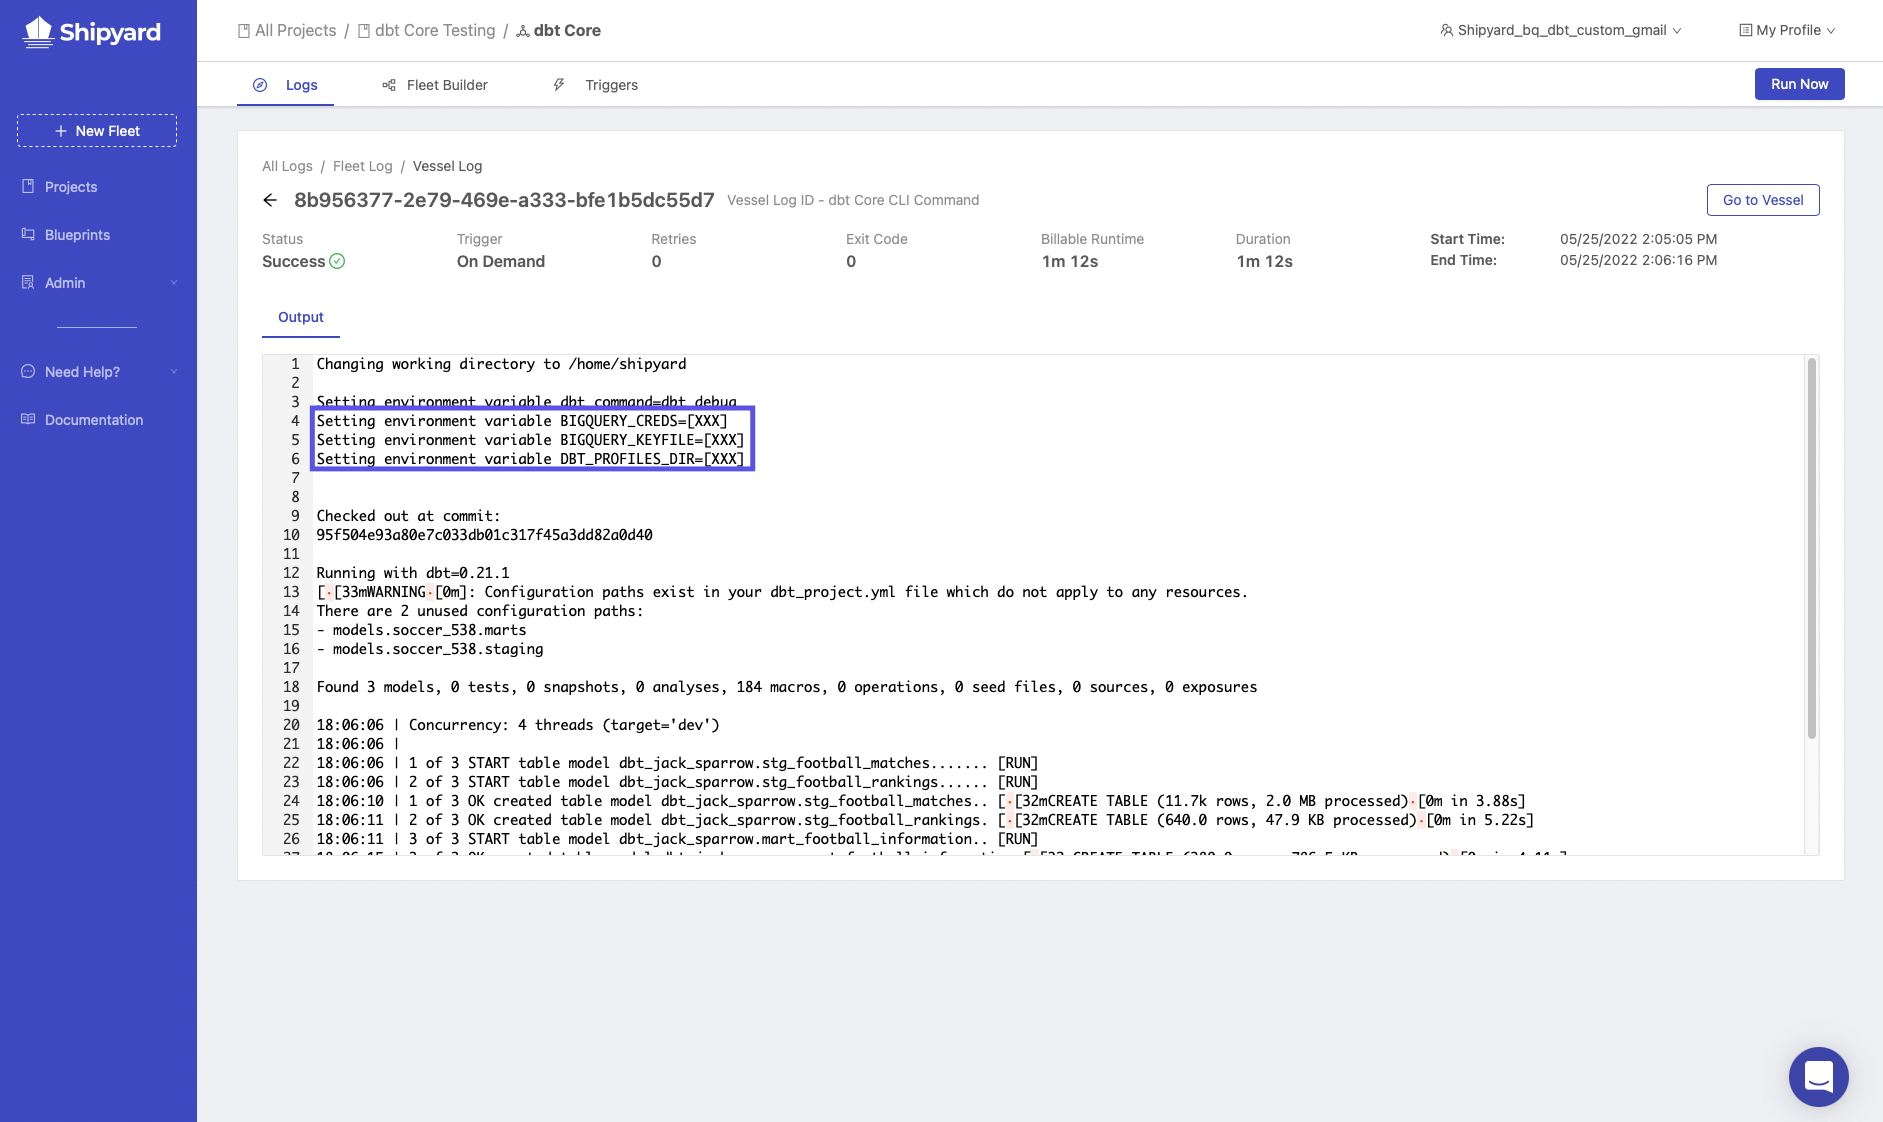
If you scroll to the top of the output, you will see that the environment variables that were put in during the Blueprint creation process are hidden from the user.
If dbt debug succeeds, we are ready to move into part three of the guide. If it fails, please go back to the steps above and make sure everything is setup correctly. Feel free to send an Intercom message to us at anytime using the widget on the bottom right of the Platform application.