Microsoft Teams Authorization
Microsoft Teams Incoming Webhook Setup
This guide provides instructions on how to set up and remove an incoming webhook in Microsoft Teams.
Setting Up an Incoming Webhook
To add an incoming webhook to a Teams channel, follow these steps:
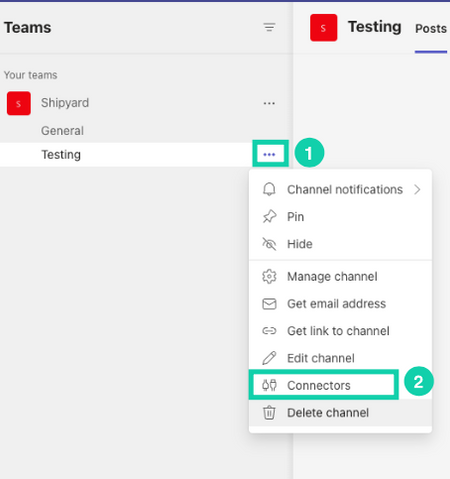
Open the channel in which you want to add the webhook and select ••• from the upper-right corner.
Select "Connectors" from the dropdown menu.
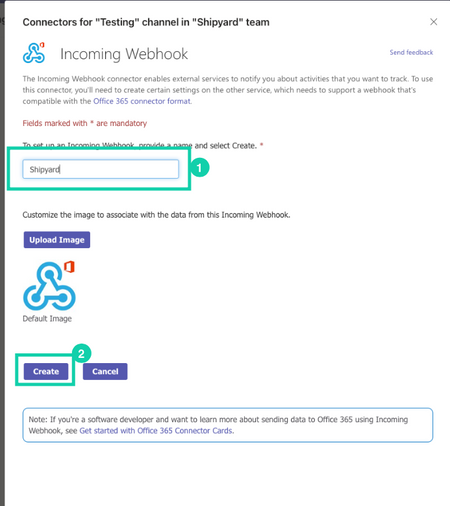
Search for "Incoming Webhook" and select "Configure".

Name the webhook and click "create"
Copy and save the unique webhook URL present in the dialog. The URL maps to the channel and you can use it to send information to Teams.
Select "Done".
Your webhook is now available in the Teams channel.
Removing an Incoming Webhook
To remove an incoming webhook from a Teams channel, follow these steps:
- Open the channel and select ••• from the upper-right corner.
- Select "Connectors" from the dropdown menu.
- Select "Configured" under "MANAGE".
- Select the "1 Configured" to see a list of your current connectors.
- Select "Manage" for the connector that you want to remove.
- Select "Remove".
- In the "Remove Configuration" window that appears, select the required checkboxes.
- Select "Remove".